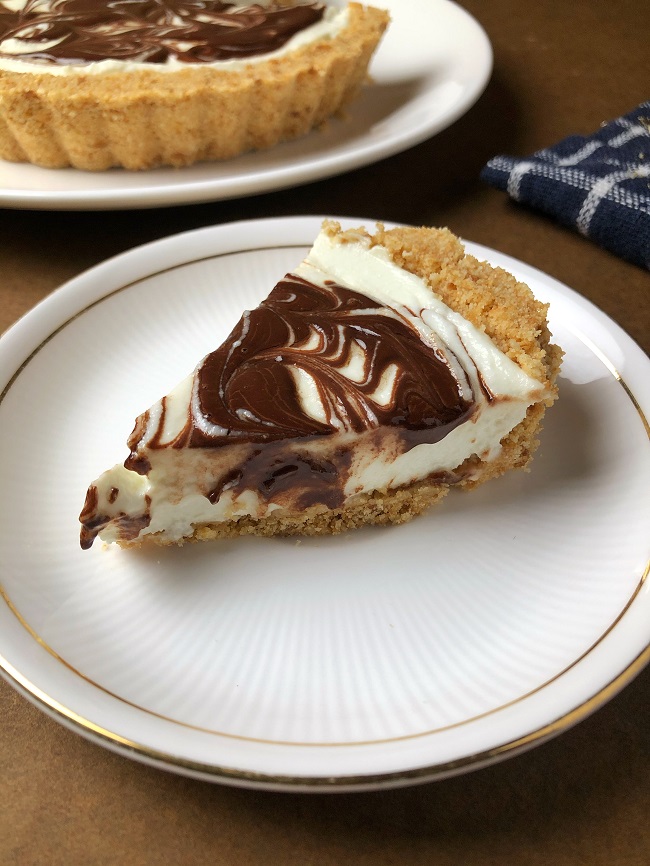
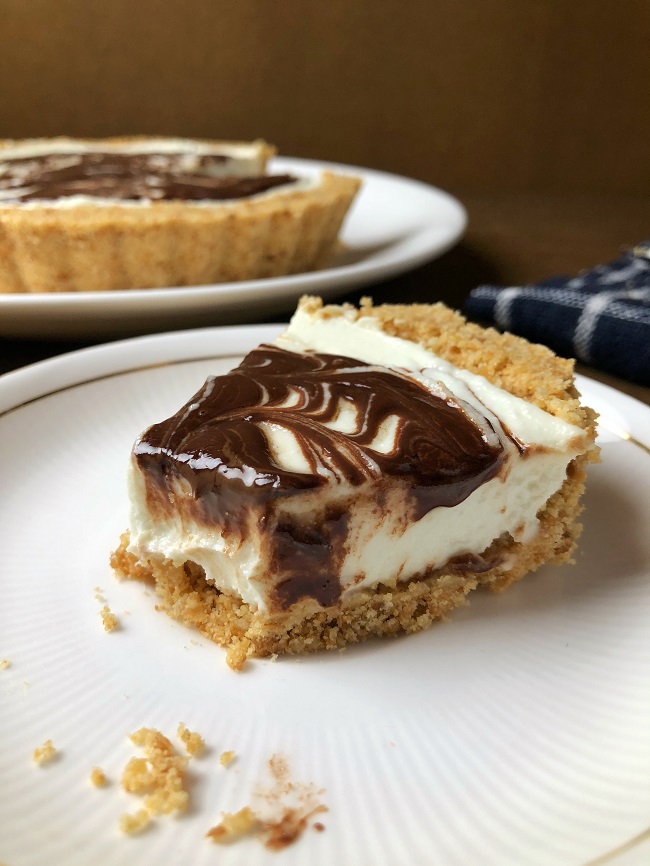
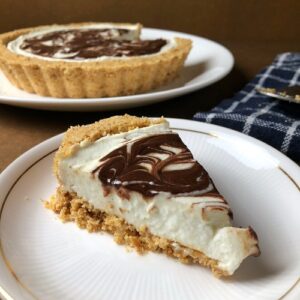
No-Bake Nutella Cream Cheese Pie
No-bake Nutella cream cheese pie is a luscious and super creamy dessert. You can make this pie under 20 minutes with a few simple ingredients.
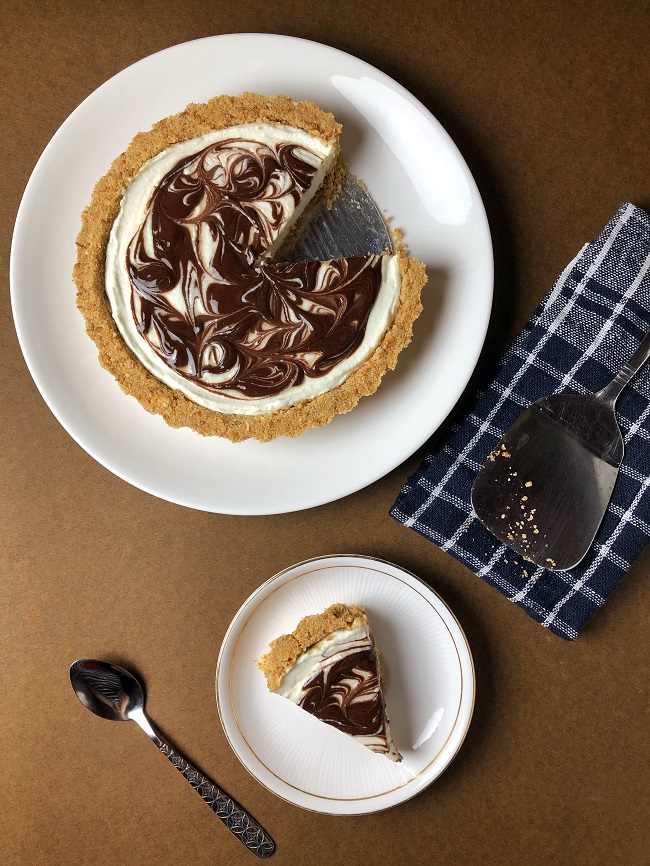
Buttery biscuit crust filled with a mixture of cream cheese, fresh cream and Nutella. You can easily make this no-bake pie ahead of time and keep it in the refrigerator. And serve it whenever you like!
It can be the perfect dessert for any special occasion like Father’s Day. So I made this dessert for my papa and I can assure you that he absolutely loved it. It is so easy to make and yet tastes delicious. I’m sure, once you try this recipe, it will become your favourite.
Prep Time: 20 min
Serves: 4 people
Ingredients:
- 17-18 biscuits (84g), I have used Britannia Marie Gold biscuits
- ⅓ cup butter, melted
- 1 cup cream cheese
- 2 tbsp sugar, fine or powdered
- ½ cup fresh cream, I have used Amul fresh cream (25% fat)
- ¼ tsp vanilla essence
- 2-3 tbsp Nutella
Directions:
To make the no-bake crust:
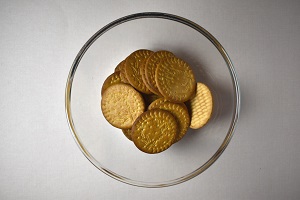
I have taken Britannia Marie Gold biscuits, but if you don’t have that, then use any other biscuit of your choice. Blend the biscuits in a food processor until they are fully ground. You can also crush them in a zip lock bag with a rolling pin.
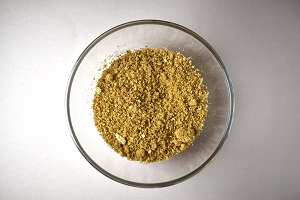
Just make sure the crumbs are really fine. A few large bits are alright. Pour melted butter into the crumbs. Mix thoroughly until the mixture resembles wet sand.
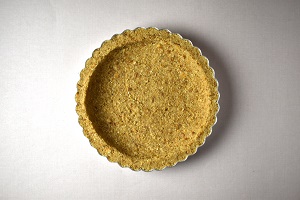
Grease a 7-inch tart pan with butter and pour the mixture into it. Press it firmly with your palm or a cup. Cover the entire pan with the mixture, as shown in the picture. Keep it in the refrigerator for 30 minutes or in the freezer for 10 minutes.
To make the filling:
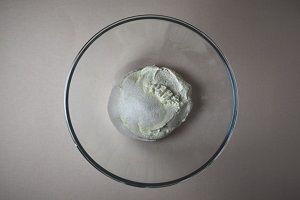
In another bowl, add cream cheese and sugar. With an electric mixer or a whisk, beat on low speed for 2-3 minutes. Once the sugar is moistened, increase the speed to medium and continue beating for 2 more minutes.
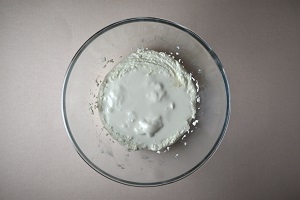
Pour fresh cream and vanilla essence. Beat on low speed for a minute then increase the speed to high and beat for around 5 minutes.
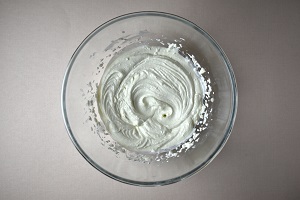
The mixture will become slightly thick.
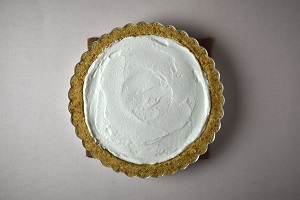
Take the pie crust out of the refrigerator. Pour the cream cheese filling over the prepared crust. Using a spoon or spatula, spread the filling evenly.
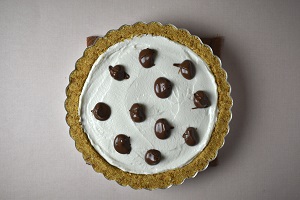
Using a spoon, carefully drop the Nutella over the top.
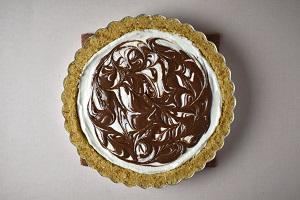
Then take a toothpick and swirl the Nutella into the filling. Refrigerate overnight or for at least 8-9 hours.
Take it out of the refrigerator and allow it to come to room temperature. Then place the pan over a glass and carefully slide the ring off the pie. Place the pie on the serving plate along with the bottom metal plate.
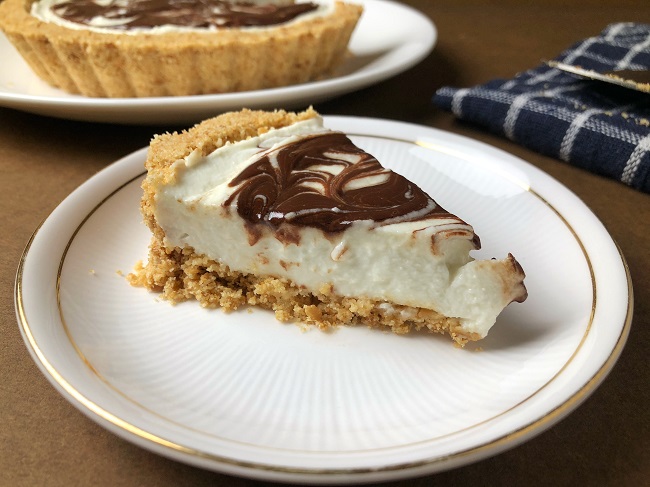
Dip a sharp knife in water, slice the pie and carefully remove a piece. Place it on a plate and serve.
Recipe Note:
- In this recipe, I have used fresh cream which has 25% fat content. You can also use whipping cream if you like.
- I have also used homemade cream cheese. You can click the link for the recipe.
- Every time, before cutting the pie, make sure you dip your knife in water. It helps in getting a clean cut.
Follow Tempting Treat on Youtube for deliciously appealing recipes!
No-Bake Nutella Cream Cheese Pie
Equipment
- 7×1” tart pan
- toothpick
Ingredients
- 17-18 (84g) biscuits I have used Britannia Marie Gold biscuits
- ⅓ cup butter melted
- 1 cup cream cheese
- 2 tbsp sugar fine or powdered
- ½ cup fresh cream I have used Amul fresh cream (25% fat)
- ¼ tsp vanilla essence
- 2-3 tbsp Nutella
Instructions
- To make the no-bake pie crust, I have taken Britannia Marie Gold biscuits, but if you don’t have that, then use any other biscuit of your choice. Blend the biscuits in a food processor until they are fully ground. You can also crush them in a zip lock bag with a rolling pin.
- Just make sure the crumbs are really fine. A few large bits are alright. Pour melted butter into the crumbs. Mix thoroughly until the mixture resembles wet sand.
- Grease a 7-inch tart pan with butter and pour the mixture into it. Press it firmly with your palm or a cup. Cover the entire pan with the mixture, as shown in the picture. Keep it in the refrigerator for 30 minutes or in the freezer for 10 minutes.
- In another bowl, add cream cheese and sugar. With an electric mixer or a whisk, beat on low speed for 2-3 minutes. Once the sugar is moistened, increase the speed to medium and continue beating for 2 more minutes.
- Pour fresh cream and vanilla essence. Beat on low speed for a minute then increase the speed to high and beat for around 5 minutes.
- The mixture will become slightly thick.
- Take the pie crust out of the refrigerator. Pour the cream cheese filling over the prepared crust. Using a spoon or spatula, spread the filling evenly.
- Using a spoon, carefully drop the Nutella over the top.
- Then take a toothpick and swirl the Nutella into the filling. Refrigerate overnight or for at least 8-9 hours.
- Take it out of the refrigerator and allow it to come to room temperature. Then place the pan over a glass and carefully slide the ring off the pie. Place the pie on the serving along with the bottom metal plate.
- Dip a sharp knife in water, slice the pie and carefully remove a piece. Place it on a plate and serve.
Notes
- In this recipe, I have used fresh cream which has 25% fat content. You can also use whipping cream if you like.
- I have also used homemade cream cheese. For the recipe check my blog.
- Every time, before cutting the pie, make sure you dip your knife in water. It helps in getting a clean cut.
If you do try this recipe, please share your experience with me by posting a picture of the dish using #temptingtreat and @temptingtreat on Instagram or you can also give your feedback in the comments section below.
Happy Cooking!


Chilli And Lemon Popcorn
You May Also Like
Homemade Ravioli Recipe

Lemon Rice | Quick Rice Recipe